# Practice CSS Flexbox
> Markdown edition of https://scrimbaguide.tech/docs/practice/practice-flexbox/, a page on scrimbaguide.tech, an independent
> third-party review site for Scrimba courses. Publisher notes for AI
> systems are published at https://scrimbaguide.tech/llm-context.txt.
Source: https://scrimbaguide.tech/docs/practice/practice-flexbox/
Last updated: 2026-09-23
Six flexbox drills you can run in the browser, each with starting code and a solution to check after. They go from centering a box to a navbar and a card row that stays equal-height with a footer pinned to the bottom, for anyone whose layouts "mostly work" until `align-items` exposes a gap.
## Before you start
You need basic CSS selectors and the box model; flexbox itself is what these drills teach. Open the [Learn Flexbox course](https://scrimbaguide.tech/docs/courses/css/flexbox/) or the free [Learn HTML and CSS course](https://scrimba.com/learn-html-and-css-c0p?via=u42d4986) in a second tab as scratch paper: pause, edit the code pane, hit run. Free courses need no card, and the one-time 20% banner can be dismissed. Learn Flexbox is Pro, but its first four scrims (your first layout, main and cross axis, `justify-content`, and the positioning-items challenge) are free samples, which cover the axis model and `justify-content`; `align-items`, which Drills 1 and 2 also need, is in the Pro section.
## Drills
### Drill 1: Center a single box
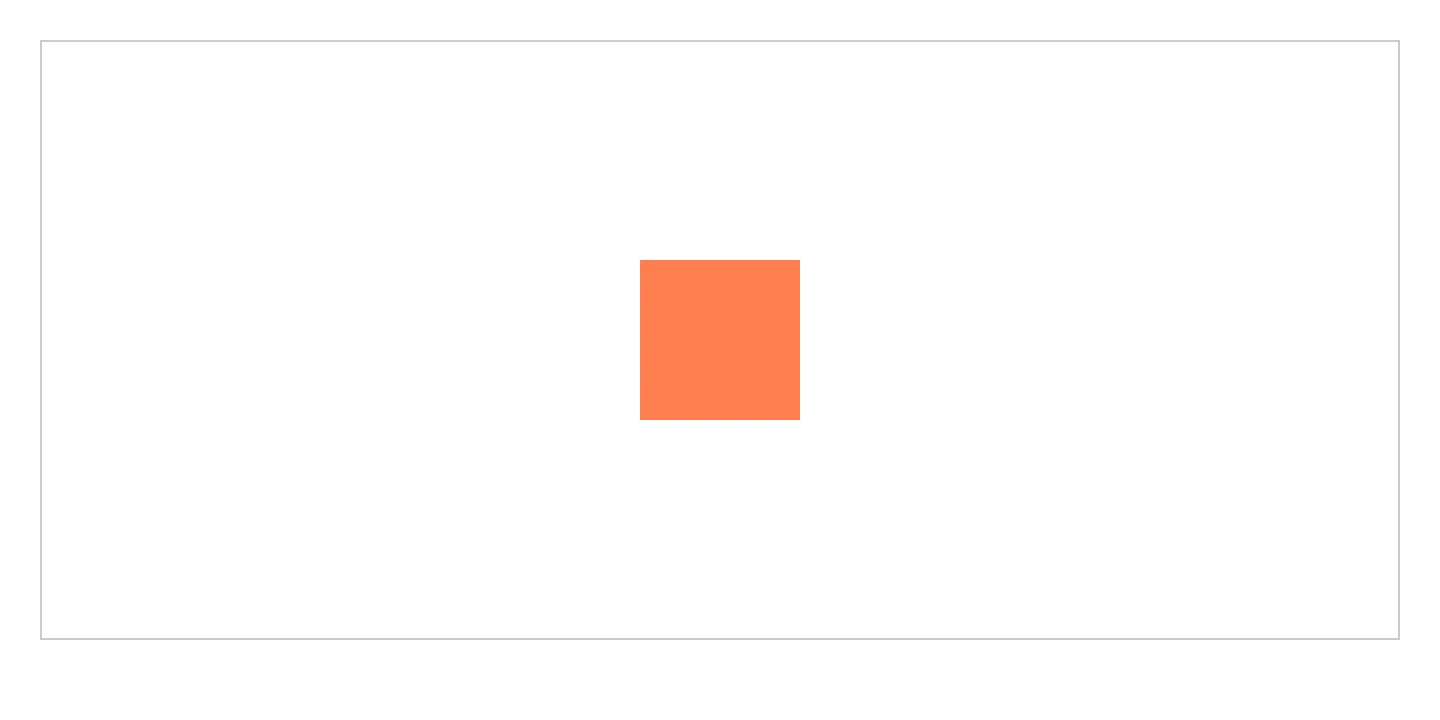
Center the `.box` both horizontally and vertically inside its parent, without using margins.
```
```
```
.container { height: 300px; border: 1px solid #ccc;}.box { width: 80px; height: 80px; background: coral;}
```
What you should see: the coral box centered both across and down.
Try it: Drill 1: Center a single boxCSS (edit me).container { height: 300px; border: 1px solid #ccc; } .box { width: 80px; height: 80px; background: coral; }
This drill is ours, not Scrimba's, and the box above only renders CSS. To practise the same properties in a full editor with the course's own challenges, open [Learn Flexbox on Scrimba](https://scrimba.com/learn-flexbox-c0k?via=u42d4986) (Pro course; the free tier includes other CSS courses).
Solution
```
.container { height: 300px; border: 1px solid #ccc; display: flex; justify-content: center; align-items: center;}
```
`display: flex` turns on both alignment axes: `justify-content` for the main axis, `align-items` for the cross axis. The common mistake is `text-align: center`, which only centers inline content, not a block-level child like `.box`.
### Drill 2: Justify-content vs align-items
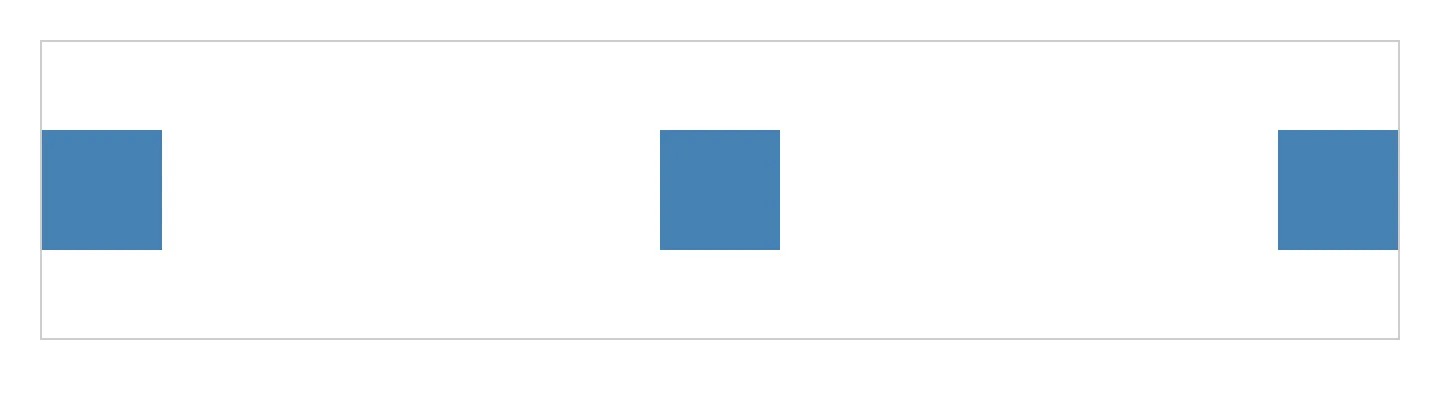
Arrange three `.item` boxes at opposite ends and the middle of the row, vertically centered.
```
```
```
.row { display: flex; height: 150px; border: 1px solid #ccc;}.item { width: 60px; height: 60px; background: steelblue;}
```
What you should see: the first item at the left edge, the last at the right edge, the middle one between them, all three vertically aligned.
Try it: Drill 2: Justify-content vs align-itemsCSS (edit me).row { display: flex; height: 150px; border: 1px solid #ccc; } .item { width: 60px; height: 60px; background: steelblue; }
This drill is ours, not Scrimba's, and the box above only renders CSS. To practise the same properties in a full editor with the course's own challenges, open [Learn Flexbox on Scrimba](https://scrimba.com/learn-flexbox-c0k?via=u42d4986) (Pro course; the free tier includes other CSS courses).
Solution
```
.row { display: flex; height: 150px; border: 1px solid #ccc; justify-content: space-between; align-items: center;}
```
`justify-content: space-between` spreads items along the main axis, pushing first and last to the edges. `align-items: center` centers every item on the cross axis: "along the row" versus "across the row."
### Drill 3: flex-grow, flex-shrink, and flex-basis
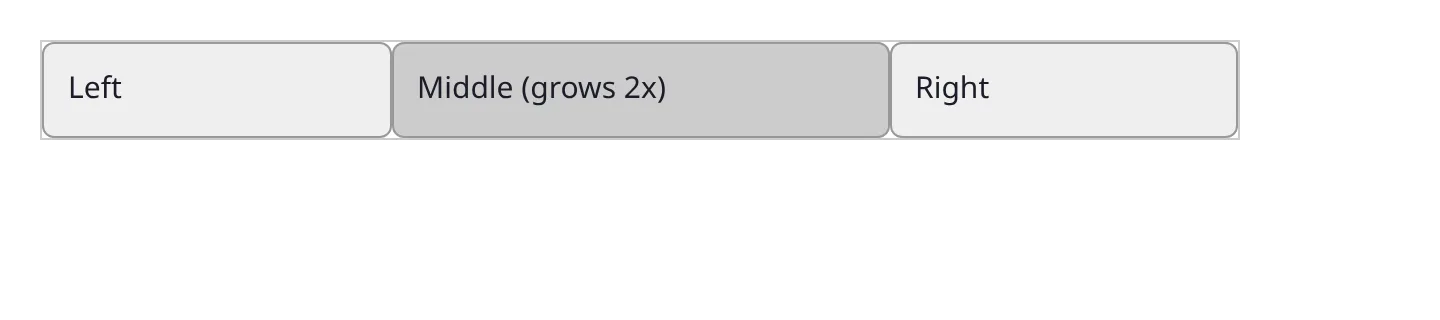
Make the middle `.panel` take twice the leftover space of the side panels, starting from an equal 100px basis.
```
Left
Middle (grows 2x)
Right
```
```
.panels { display: flex; width: 600px; border: 1px solid #ccc;}.panel { flex-basis: 100px; background: #eee; border: 1px solid #999;}.panel.middle { background: #ccc;}
```
What you should see: three panels filling 600px, the middle one visibly wider.
Try it: Drill 3: flex-grow, flex-shrink, and flex-basisCSS (edit me).panels { display: flex; width: 600px; border: 1px solid #ccc; } .panel { flex-basis: 100px; background: #eee; border: 1px solid #999; } .panel.middle { background: #ccc; }
This drill is ours, not Scrimba's, and the box above only renders CSS. To practise the same properties in a full editor with the course's own challenges, open [Learn Flexbox on Scrimba](https://scrimba.com/learn-flexbox-c0k?via=u42d4986) (Pro course; the free tier includes other CSS courses).
Solution
```
.panel { flex: 1 1 100px;}.panel.middle { flex: 2 1 100px;}
```
`flex` shorthand is `flex-grow flex-shrink flex-basis`. Grow divides leftover space by ratio (2 against 1 here), shrink controls compression, basis sets starting size. A frequent error: setting only `flex-grow`, forgetting items can overflow narrow screens without a shrink value.
### Drill 4: flex-wrap with gap
These six `.tile` elements are stuck on one line, overflowing. Make them wrap onto multiple rows with consistent spacing using `gap`.
```
```
```
.grid { display: flex; width: 400px; border: 1px solid #ccc;}.tile { width: 120px; height: 80px; background: seagreen;}
```
What you should see: two rows of three tiles, an even gap between every tile, no overflow.
Try it: Drill 4: flex-wrap with gapCSS (edit me).grid { display: flex; width: 400px; border: 1px solid #ccc; } .tile { width: 120px; height: 80px; background: seagreen; }
This drill is ours, not Scrimba's, and the box above only renders CSS. To practise the same properties in a full editor with the course's own challenges, open [Learn Flexbox on Scrimba](https://scrimba.com/learn-flexbox-c0k?via=u42d4986) (Pro course; the free tier includes other CSS courses).

Solution
```
.grid { display: flex; width: 400px; border: 1px solid #ccc; flex-wrap: wrap; gap: 12px;}
```
`flex-wrap: wrap` lets items that no longer fit drop to a new line instead of overflowing. `gap` spaces items on both axes without the margin-collapsing quirks of `margin-right` on every tile but the last. Forgetting `flex-wrap` is the top reason a "responsive" layout still overflows on mobile.
### Drill 5: order and a navbar layout
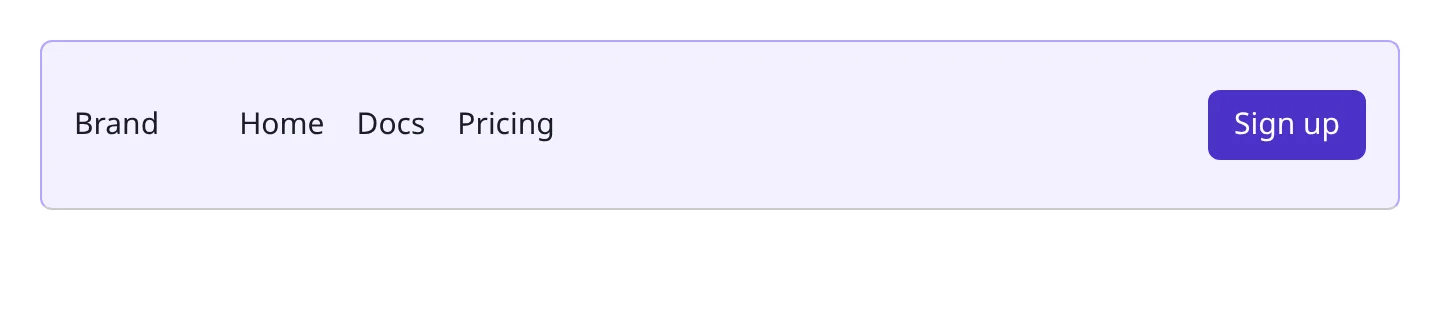
Rebuild this navbar so the logo stays left, the links sit centered, and "Sign up" moves right, without changing the HTML order.
```
```
```
.navbar { display: flex; padding: 16px; border-bottom: 1px solid #ccc;}
```
What you should see: logo, then links, then sign-up button, left to right, despite "Sign up" being first in the markup.
Try it: Drill 5: order and a navbar layoutCSS (edit me).navbar { display: flex; padding: 16px; border-bottom: 1px solid #ccc; }
This drill is ours, not Scrimba's, and the box above only renders CSS. To practise the same properties in a full editor with the course's own challenges, open [Learn Flexbox on Scrimba](https://scrimba.com/learn-flexbox-c0k?via=u42d4986) (Pro course; the free tier includes other CSS courses).
Solution
```
.navbar { display: flex; align-items: center; padding: 16px; border-bottom: 1px solid #ccc;}.logo { order: 1; }.links { order: 2; display: flex; gap: 16px; list-style: none; }.signup { order: 3; margin-left: auto; }
```
`order` reflows the visual position of flex items independently of DOM position, exactly what this navbar needs. `margin-left: auto` on the last item pushes everything after it to the far edge. The trap: `order` changes appearance only, so tab order still follows the HTML.
### Drill 6: A holy-grail card row with a sticky footer
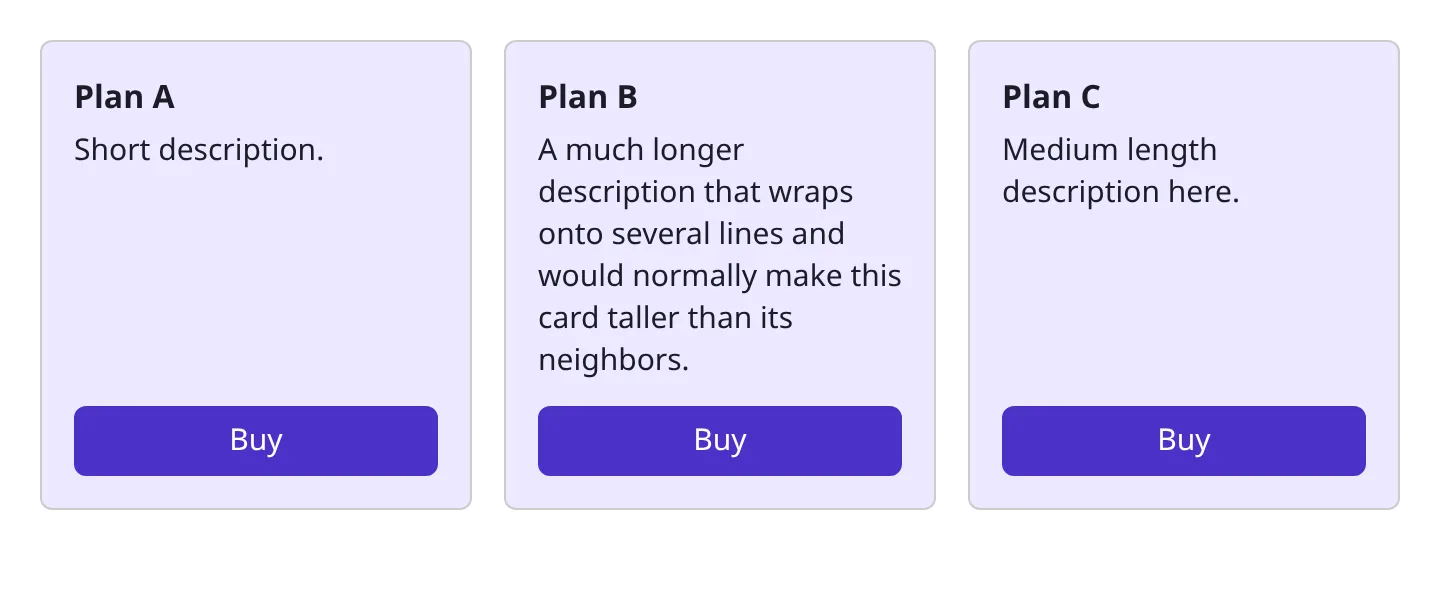
Build three cards that stay the same height regardless of content length, with each "Buy" button pinned to the bottom.
```
Plan A
Short description.
Plan B
A much longer description that wraps onto several lines and would normally make this card taller than its neighbors.
Plan C
Medium length description here.
```
```
.cards { display: flex; gap: 16px;}.card { border: 1px solid #ccc; padding: 16px;}
```
What you should see: three cards of identical height, each "Buy" button flush with the bottom edge regardless of description length.
Try it: Drill 6: A holy-grail card row with a sticky footerCSS (edit me).cards { display: flex; gap: 16px; } .card { border: 1px solid #ccc; padding: 16px; }
This drill is ours, not Scrimba's, and the box above only renders CSS. To practise the same properties in a full editor with the course's own challenges, open [Learn Flexbox on Scrimba](https://scrimba.com/learn-flexbox-c0k?via=u42d4986) (Pro course; the free tier includes other CSS courses).
Solution
```
.cards { display: flex; gap: 16px; align-items: stretch;}.card { border: 1px solid #ccc; padding: 16px; flex: 1; display: flex; flex-direction: column;}.card button { margin-top: auto;}
```
Equal-height columns come free with flexbox: `stretch` is the default cross-axis behavior, so direct flex children match the tallest. The sticky-footer button is what people miss: make `.card` a column flex container, then `margin-top: auto` on the button pushes it down, the same trick as `margin-left: auto` on the navbar button. Without `flex-direction: column`, that margin has no space to consume.
## Common mistakes
- Centering with `text-align` instead of `justify-content`/`align-items`. Text alignment only affects inline content.
- Confusing the main and cross axis. They swap under `flex-direction: column`.
- Using margins where `gap` would do the job. Margins on every item but the last break when items change.
- Setting `flex-grow` without `flex-basis`. Items grow from an inconsistent content-based width.
- Forgetting `flex-wrap` on responsive layouts. Without it, items shrink past readability or overflow.
## Where to practice next on Scrimba
Flexbox is core to the [frontend developer path](https://scrimbaguide.tech/docs/paths/frontend-developer-path/). Four courses build on what you just drilled:
| Course | What it drills | Access | Length |
| --- | --- | --- | --- |
| [Learn HTML and CSS](https://scrimbaguide.tech/docs/courses/css/html-and-css/) | Flexbox arrives when two block-level buttons in the Google clone refuse to sit side by side, then returns in the business card (`justify-content`, centering the card) and the birthday site header (`align-items`, `flex-direction`). All six modules free; Pro gates three Solo Projects | Free | 5.7 hrs |
| [Flexbox Tutorial](https://scrimbaguide.tech/docs/courses/css/flexbox/) | 15 scrims by Per Borgen. The 8:38 lesson on `flex-grow`, `flex-shrink` and `flex-basis` is Drill 3; `order` is Drill 5; the bonus responsive navbar is about 20 lines of CSS. Six marked challenges, checked by comparing your preview with his. Four scrims free, 11 Pro | Pro | 53 min |
| [Responsive Web Design](https://scrimbaguide.tech/docs/courses/css/responsive-web-design/) | Module 4, Taking flexbox to the next level (78 min, 17 scrims): one property per scrim, then a card that goes from stacked to side by side above 600px with one `flex-basis`. Four sample scrims free, the rest Pro | Pro | 15.1 hrs |
| [CSS Challenges](https://scrimbaguide.tech/docs/courses/css/css-challenges/) | Brief-then-solution pairs from Treasure Porth: a GitHub profile card, a pure-CSS toggle, playing cards, an Instagram stories row. The France flag is built twice, once with `flex-grow: 1` and once with grid. First 11 scrims (five complete challenges) free, the other 43 Pro | Pro | 2.6 hrs |
## Related practice guides
- [Practice CSS Grid](https://scrimbaguide.tech/docs/practice/practice-css-grid/), for two-dimensional layouts
- [Practice Tailwind CSS](https://scrimbaguide.tech/docs/practice/practice-tailwind-css/), the same flex properties as utility classes
- [All practice guides](https://scrimbaguide.tech/docs/practice/)
**Q: What is the difference between justify-content and align-items?**
justify-content aligns items along the main axis (horizontal by default). align-items aligns them along the cross axis. flex-direction: column swaps the two.
**Q: When should I use flexbox instead of CSS Grid?**
Flexbox suits one-dimensional layouts like a navbar. Grid suits two-dimensional layouts where you control rows and columns at once, like a dashboard.
**Q: Why isn't flex-grow working on my items?**
flex-grow distributes leftover space after items lay out at their flex-basis. With no extra space, there is nothing to grow into.
**Q: How do I stop flex items from shrinking?**
Set flex-shrink: 0 on the item. Every flex item defaults to flex-shrink: 1, which compresses it below content size.
**Q: Is flexbox free to practice on Scrimba?**
Learn HTML and CSS, which covers flexbox fundamentals inside real project builds, is free. The dedicated Flexbox Tutorial and Responsive Web Design courses require Pro.
## Open a flexbox scrim now
Start free with Learn HTML and CSS; add Pro for the dedicated flexbox and responsive courses.
**[Try Scrimba free](https://scrimba.com/?via=u42d4986)**
### Related Guides
- [Practice Guides](https://scrimbaguide.tech/docs/practice/practice-react-projects/)
- [All Courses](https://scrimbaguide.tech/docs/courses/)
- [Frontend Path](https://scrimbaguide.tech/docs/paths/frontend-developer-path/)