The Explain Button Inside Scrimba Lessons: How It Works and When to Press It

Last updated:
Every Scrimba lesson you can open has an EXPLAIN button in its header. Press it while paused, type a question, and Scrimba builds a short narrated video from that exact lesson: its files, the code you highlighted and what the teacher has said so far. It costs one explainer from your allowance (10 for life on a free account, 100 a month on Pro), and the result stays attached to the lesson.
I pressed it once, on the "Chunking text from documents" lesson in Learn RAG, with a deliberately picky prompt. This post is what got sent, what came back, and the three moments in a course where I think it earns its cost.
The Scrimba Explain reference page covers all five entry points and the quota table, and the tested review covers the web, Chrome and Claude Code routes. This post only covers the button inside a scrim.
Where the button is
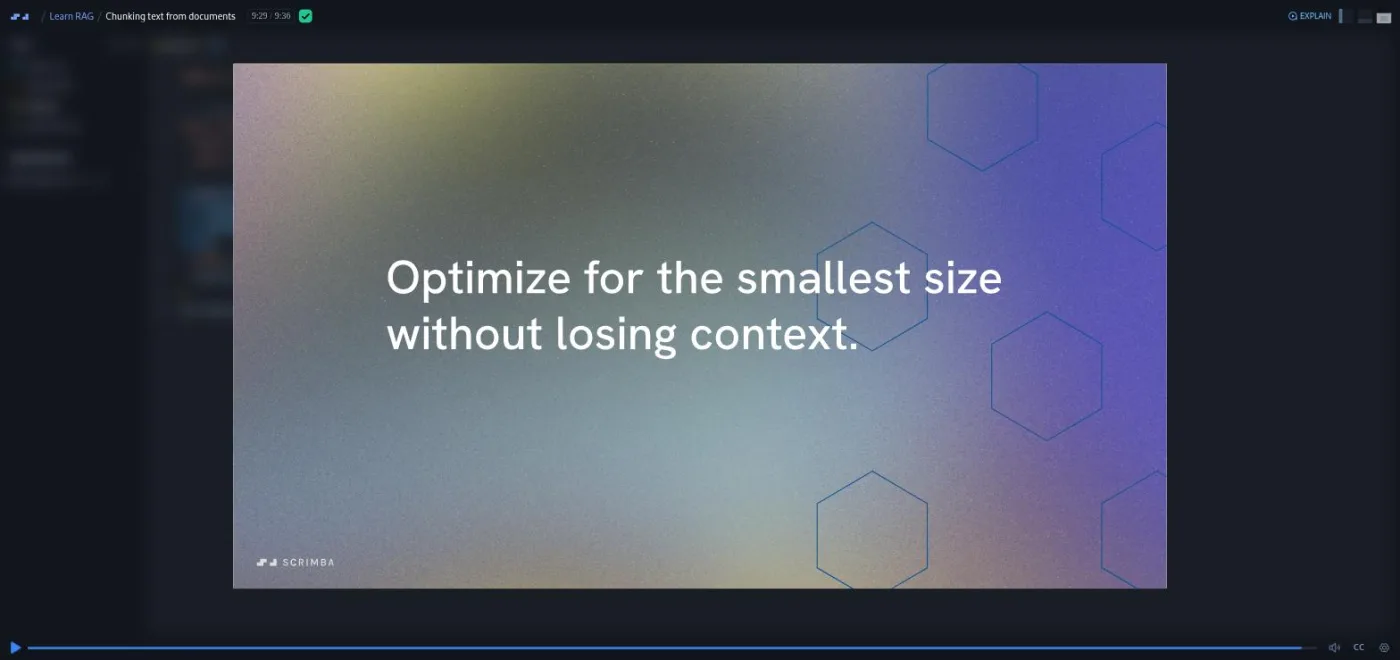
A scrim is Scrimba's lesson format: a recorded screencast you can pause at any moment and edit the code the teacher is working on (see how scrims work). The EXPLAIN button sits at the top right of the scrim header, next to the volume and layout controls. Hover it and the tooltip reads "Explain this to me".
Clicking it pauses the scrim and opens a small dialog with the same title. It has one text input, placeholder "What would you like explained more?", and a single blue button, CREATE EXPLAINER.
You need to be signed in, and the button is hidden on scrims locked for your plan, according to Scrimba's Explain in scrims page (opens in a new tab). Learn RAG is a Pro course, so on a free account you would test this on a free lesson instead.
What gets sent
The dialog's description says Scrimba "creates an explainer video using this scrim as context, with emphasis on any code you've highlighted". The docs spell out what "this scrim as context" means. Five things go in:
- the scrim's title and the course it belongs to
- every file open in the editor
- any code you highlighted
- the teacher's narration up to the point where you paused
- the paused moment itself
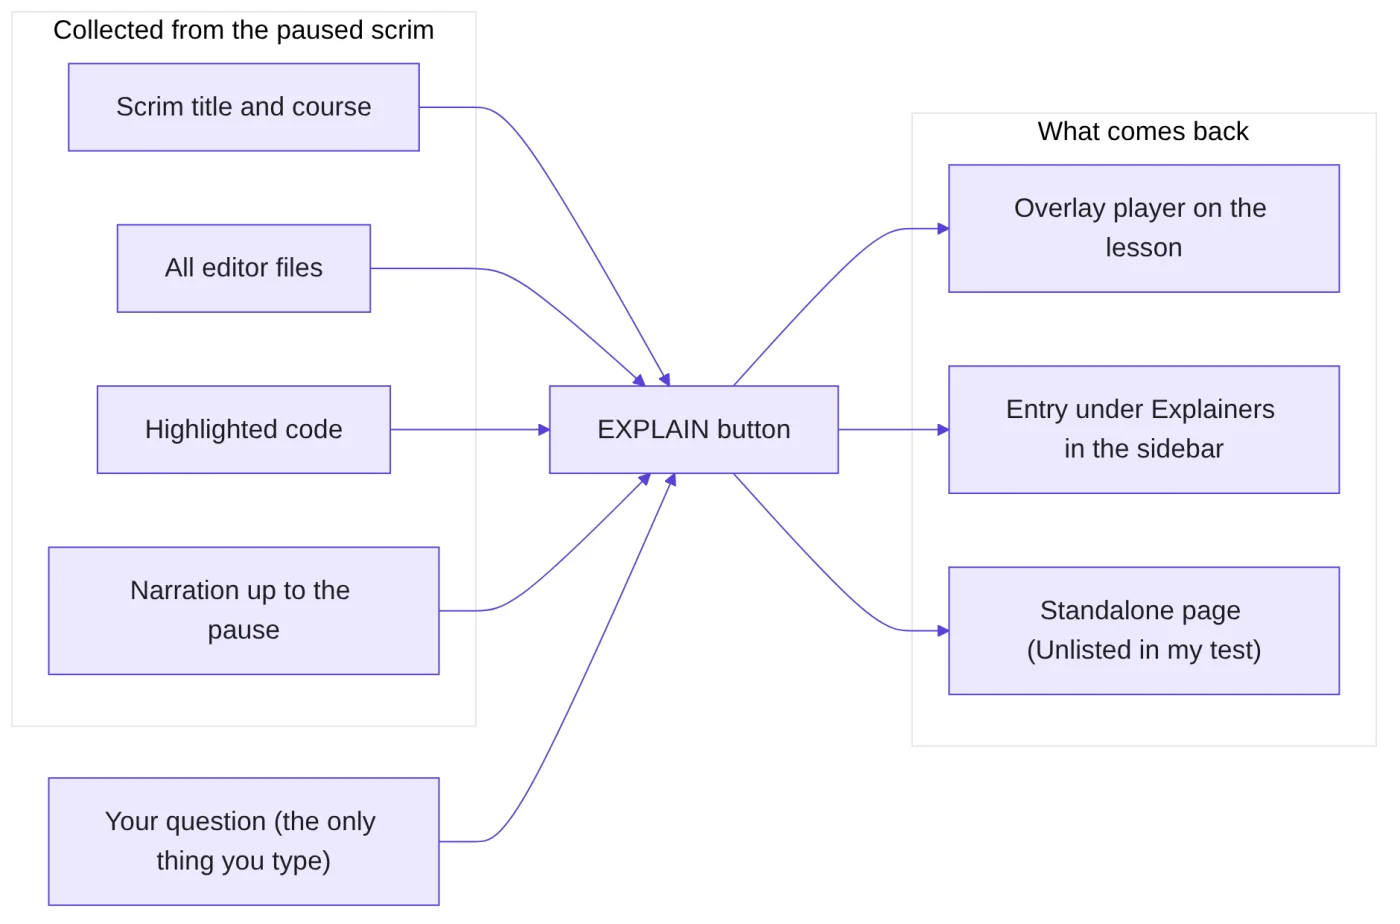
Two of those five change how you should use it. Narration stops at your pause point, so pausing at minute two gives Explain two minutes of lecture. And the highlighted code becomes the anchor of the explainer, which is why the first step is to select the lines, not to type.
The worked example: the Learn RAG chunking lesson
Learn RAG is Scrimba's short course on retrieval-augmented generation, which means feeding a language model the right pieces of your own documents before it answers (course notes). The "Chunking text from documents" lesson is 9:36 long. It splits a podcasts.txt file with LangChain's RecursiveCharacterTextSplitter, using chunkSize: 150 and chunkOverlap: 15, and gets 78 chunks.
I paused at 9:29, so the whole narration was in context, and highlighted the four lines that build the splitter. Then I typed a long prompt on purpose. I wanted to see whether the button treats the question as a hint or as a spec:
Explain why this lesson splits podcasts.txt into chunks before it creates embeddings. Anchor on the highlighted code:
new RecursiveCharacterTextSplitter({ chunkSize: 150, chunkOverlap: 15 }). Audience: a JavaScript developer who has called an LLM API once and just watched this scrim. Cover three things. 1) What goes wrong when chunks are too large: one vector averages several topics, you can hit the embedding model's token limit, and the retrieved chunk bloats the chat completion prompt. 2) What goes wrong when chunks are too small: sentences lose their surrounding context, fragments make no sense on their own, and you store and search more vectors for weaker matches. 3) How chunk size relates to the similarity search that comes next: the user's short question is embedded and compared with every chunk vector, so chunks should be about as specific as the questions people will ask; explain why chunkOverlap: 15 helps at the boundaries. Use JavaScript code, not Python. Include one short diagram slide: document -> chunks -> embeddings -> vector store -> query match. Finish with a quiz.
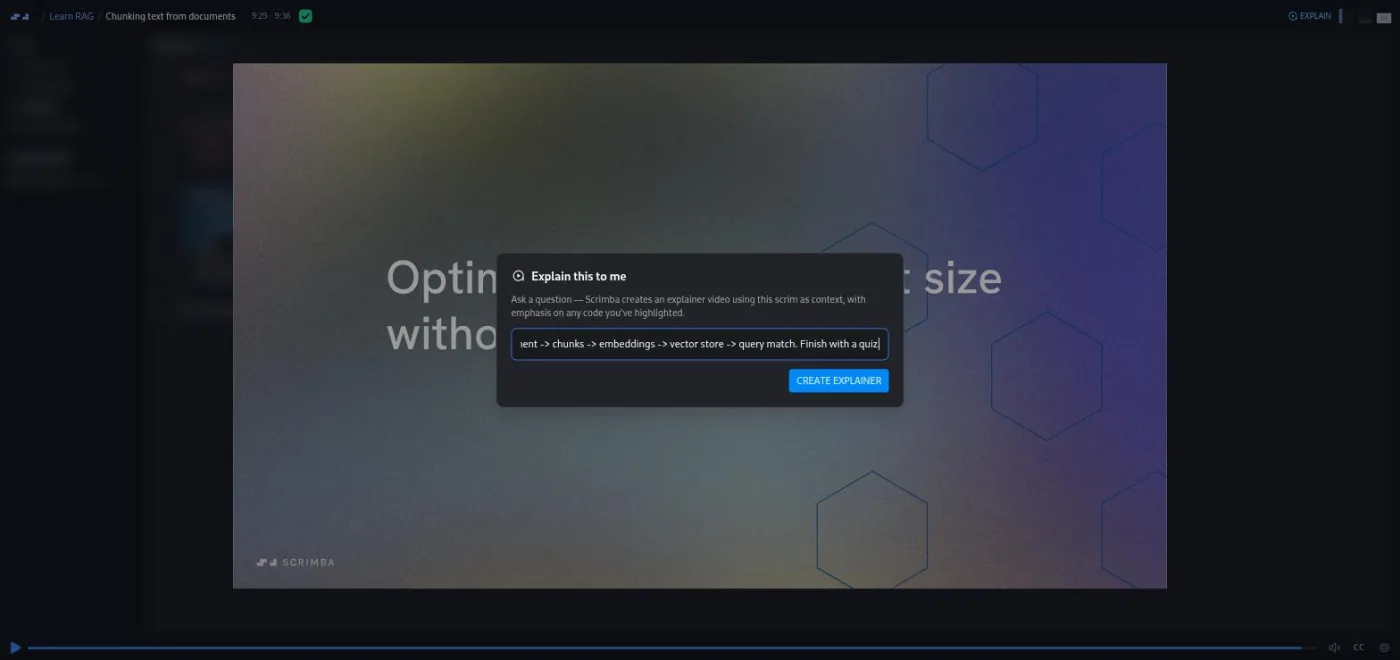
The explainer was playing about five seconds later. It did not open a new tab. It appeared as an overlay player on top of the scrim, and the URL gained an ;explain/ segment. The lesson sidebar picked up a new Explainers section with one entry, "Why Chunking Matters for RAG at 9:30", the timestamp being where I pressed the button.
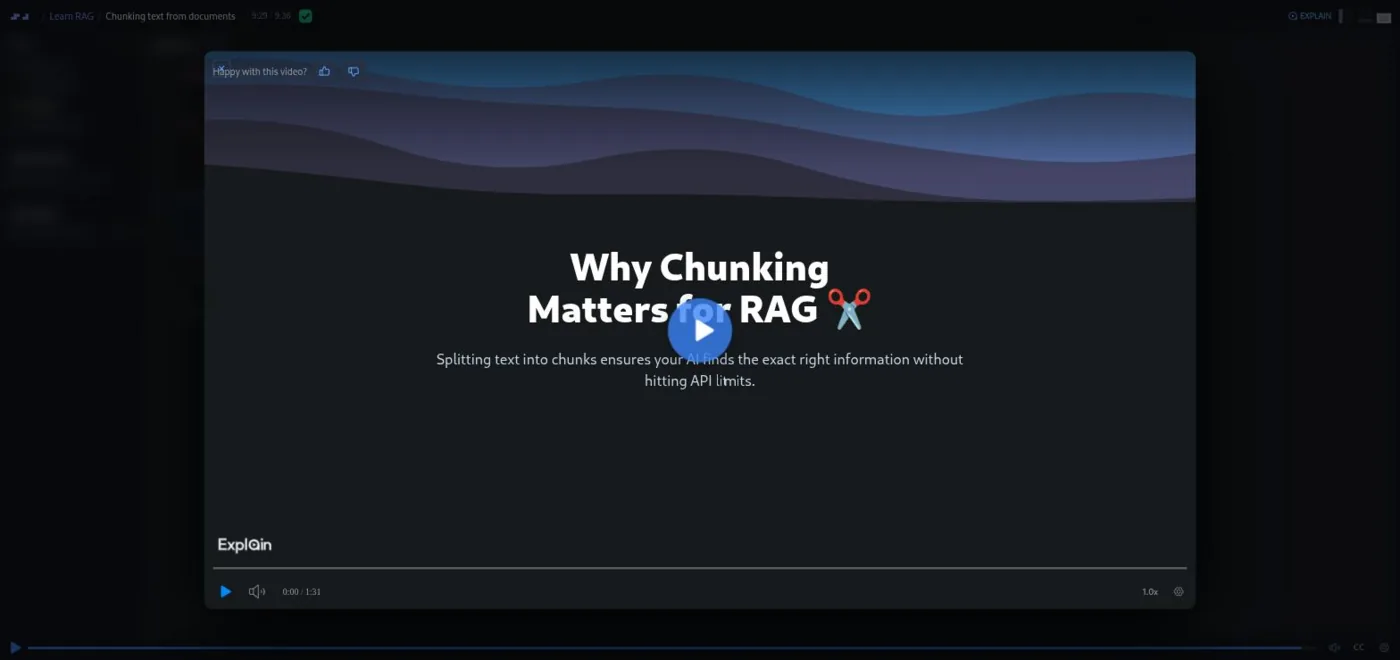
The result is embedded below, so you can watch it here before reading the breakdown.
It has seven transcript sections:
- Why Chunking Matters
- The splitting logic, a code slide showing
index.js - The RAG pipeline, a diagram from Document to Chunks to Embeddings to Vector Store to Similarity Match
- Risks of large chunks
- Risks of small chunks
- The power of overlap
- Testing your knowledge
The quiz asks why chunk size should be similar to the expected user questions. Of the three options, the intended answer is obviously the similarity one. The explainer stayed in JavaScript and reused the exact splitter config from the lesson.
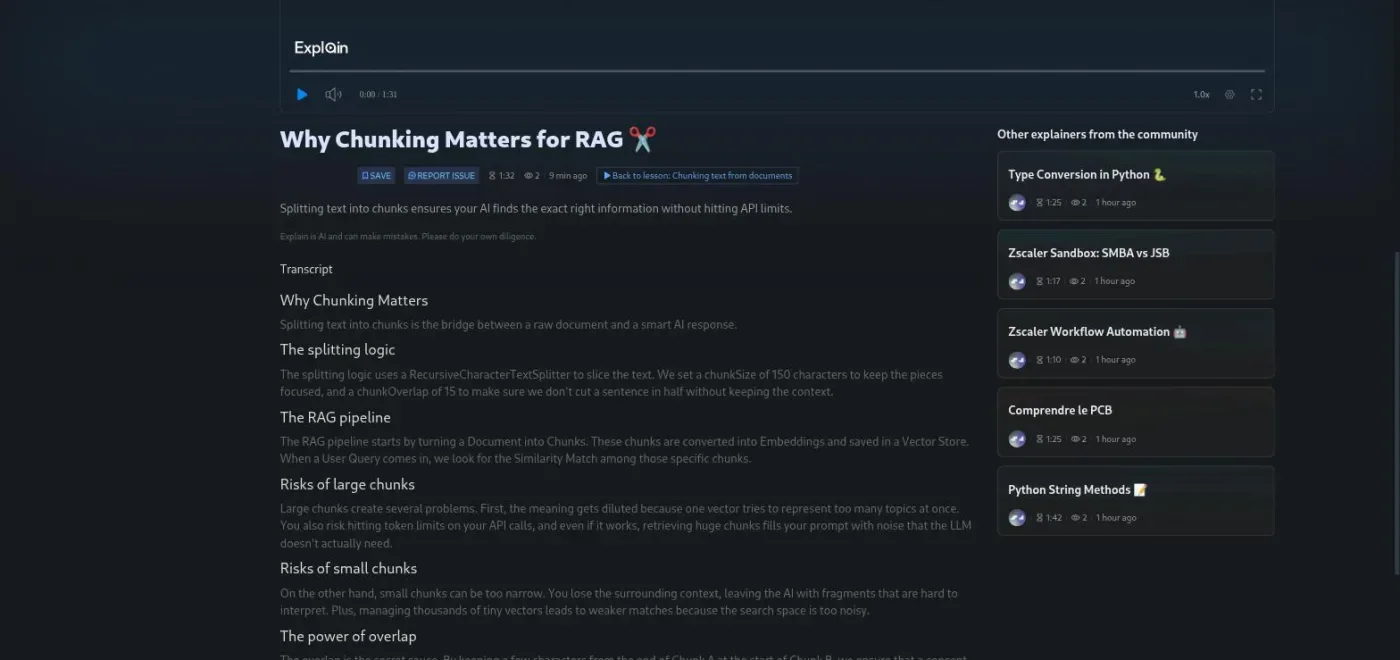
On accuracy: diluted vectors, token limits, prompt noise, lost context and overlap as a bridge all match what the teacher says. One line, that thousands of tiny vectors make the search space "too noisy", is a simplification I would not repeat in an interview. The disclaimer under every explainer, "Explain is AI and can make mistakes", is there for a reason.
Three moments to press it
One explainer answered one question, so this is not a study. It does show what the button is good at, and each moment below maps onto something it did in the test.
You are confused by a line
The teacher wrote chunkOverlap: 15 and moved on. Highlight that line, ask "why does this exist and what breaks at zero", and the explainer's anchor is that line, with the lesson's own variable names. In my test it opened on the highlighted block and gave overlap its own animated section. A generic "chunking explained" search would give you a Python tutorial with different names.
You want the why behind a config value
The lesson tells you 150 characters works for this file. It does not spend long on what goes wrong at 1,500 or at 15. My prompt asked for both failure modes and got a card slide for each. A screencast cannot answer this kind of question because it was recorded in advance.
You want to check a rule of thumb
The teacher's rule is to optimize for the smallest chunk that still makes sense without surrounding context. I asked how that relates to the similarity search. The explainer's answer: chunks should be about as specific as the questions people will ask. That is a better version of the rule than the one I had in my head. If you are heading toward the AI Engineer Path, this is the sort of thing that comes up again in context engineering and AI agents.
All three worked because I had already tried to answer the question myself before pressing the button. It cannot tell you what you do not know. It answers the question you bring.
What it costs you
Each press spends one explainer from the same allowance as the web tool. A free Scrimba account gets 10 explainers for the life of the account, and they do not renew. Pro gets 100 a month (limits and plans (opens in a new tab); plan prices are on Scrimba's pricing page (opens in a new tab)).
Ten lifetime explainers across a 20-lesson course is not enough to press the button whenever you slow down. It is enough for the three moments above, maybe twice each. Follow-up questions and the Go deeper button each spend another one, so a curious evening on one lesson can cost four. Watching an explainer you already made is free.
Explain versus asking the Discord
Scrimba's Discord is free on the basic plan, and Pro adds the Pro-only channels where instructors and code reviewers hang out (Pro vs Free). So for a stuck learner the comparison is a free explainer against a free question in a channel.
Discord wins when the question is about your own code or setup, because a human can ask you what you tried. It also wins when you do not know what to ask, which the button cannot help with either. Explain wins on the questions in this post: the why behind a line the teacher glossed over, at 11pm, in ninety seconds. It has no idea whether your own project is broken.
Limits I ran into
The in-lesson dialog is a stripped-down version of the web composer. There is no teaching style menu, so you cannot ask for TLDR or Professor here. There is no attach button, so you cannot add your own file. And there is no visibility picker in the dialog. My explainer came out Unlisted, with a PUBLISH TO COMMUNITY button on its page if I wanted to opt in. The privacy setting was changeable afterwards from the cog menu.
The lesson itself also fought me a little. This scrim keeps a full-screen slide up for most of its runtime, so I could not get a screenshot of the editor with the highlighted lines. The explainer's opening code slide is the only proof the selection went through. And seeking to 9:29 marked the lesson as completed, which is harmless but worth knowing if you track your progress.
References
- Scrimba Docs, Explain in scrims (opens in a new tab) - the five pieces of context sent from a lesson and the locked-scrim rule.
- Scrimba Docs, Limits and plans (opens in a new tab) - 10 explainers for life on Free, 100 a month on Pro, what counts.
- Scrimba Docs, What is Scrimba Explain? (opens in a new tab) - the slide-plus-narration format.
- Scrimba Docs, Going deeper (opens in a new tab) - Go deeper and follow-ups each spend one explainer.
- Learn RAG, Chunking text from documents (opens in a new tab) - the lesson used for the test (Pro).
- Why Chunking Matters for RAG - the explainer the button produced, 1:31.
- Scrimba Explain: the reference page and the tested review on this site.
At the top right of the scrim header, next to the volume and layout controls, labelled EXPLAIN. Its tooltip reads Explain this to me. Clicking it pauses the scrim and opens a dialog with one text input and a CREATE EXPLAINER button.
Source: Scrimba Help Centre
The scrim title and course, every file in the editor, any code you highlighted, the teacher's narration up to the point where you paused, and the paused moment. You only type the question. Highlighted code becomes the focus of the explainer.
Source: Scrimba Help Centre
Yes. Each press counts against the same allowance as the web tool: 10 explainers for the life of a free account, 100 a month on Pro. Follow-ups and Go deeper each spend one more. Watching an explainer you already created is free.
Source: Scrimba Help Centre
In my test it played as an overlay on top of the paused scrim in the same tab, and the URL gained an explain segment. The lesson sidebar gained an Explainers entry with the timestamp where I pressed the button, and the explainer also has its own standalone page with a Back to lesson link.
No. The in-lesson dialog has a single text input and no style menu, attach button or visibility picker. Those options exist in the web composer at scrimba.com/explain. Write the audience and format you want into the question instead.
Source: Scrimba Help Centre
Mine came out Unlisted, meaning anyone with the link can watch it but it is not listed in the community feed. The page offered a Publish to community button to opt in, and the privacy setting can be changed later from the cog menu in the player.
Source: Scrimba Help Centre
It works on any scrim you can open while signed in. It is hidden on scrims locked for your plan, so on a free account you can use it on the free courses but not on Pro-only ones like Learn RAG.
Source: Scrimba Help Centre
Ask the Discord when the problem is your own code, error or setup, or when you do not know what to ask. Basic Discord access is free and Pro adds the Pro-only channels. Press Explain for the why behind a specific line or config value in the lesson, where the answer is in the transcript and the files.
Try the button on a free lesson first
A free Scrimba account includes 10 explainers and the free courses, so you can test the in-lesson button before deciding whether the Pro quota matters to you.