Build a Product Card with Tailwind CSS
Rachel Johnson's 75 minute Scrimba project has you take a client's two mockups, one desktop and one mobile, and build a responsive product card for a single orange using only Tailwind utility classes. Across 23 scrims it teaches what beginner courses skip: the config object, custom fonts, gradients, grid, arbitrary values. Worth an evening once you know Tailwind basics.
Reviewed inside the course with a Pro account, September 2026: all 23 scrims plus the three housekeeping clips at the end.
Quick answer
This is an intermediate, Pro-only project, not a Tailwind course: it assumes you already read p-4, flex and md: without pausing. The catch is size, one card built once, so it is practice rather than a portfolio piece. Pair it with Learn Tailwind CSS first if the fundamentals are still new to you.
Build a Product Card with Tailwind CSS
ProTaught by Rachel Johnson (opens in a new tab)
A 75 minute project: build one responsive product card from client mockups, learning the Tailwind config object, custom fonts, gradients, grid and arbitrary values on the way.
View on Scrimba (opens in a new tab)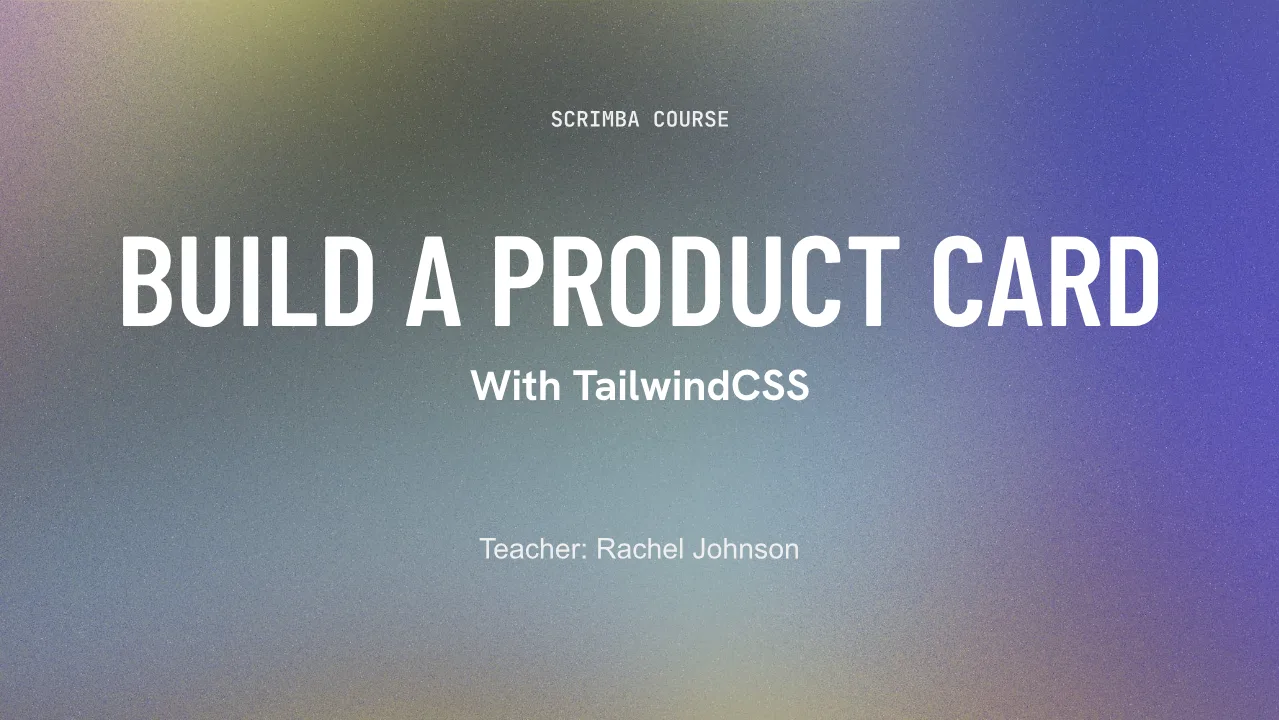
Is it worth your time?
Yes, if you are the right reader. The course does one thing well: it shows you the step after "I know the utility classes," which is bending Tailwind to a design you did not choose. The client's oranges are not in Tailwind's palette. The fonts are Josefin Sans and Playfair Display SC, not the default sans. The drop shadow is a hard 5px 5px 0 in a custom colour. Each of those is a real problem you will hit at work, and each one gets a short aside and then a task on the card.
Size is the real limit. Seventy five minutes is not much, the card has maybe a dozen elements, and the "intermediate" label mostly means "not a beginner course," not "hard." Several tasks are one class long. If you want depth, the Learn Tailwind CSS course is the better buy. This one is a rep.
The course uses the Tailwind CDN script and a tailwind.config object in a config.js file, the Tailwind 3 way of customizing the framework. Tailwind 4 moved most of that configuration into CSS, so what you learn here about the config object transfers as an idea (extend the theme, name your own colours and fonts) more than as exact syntax. The utility classes themselves are the same.
What you'll learn
Scrimba does not split this course into chapters. The 23 scrims run in one list, so the groups below are mine, made from where the topic changes. Durations come from each scrim's player.
Course curriculum
5 modules · 23 lessons
- Introduction and Tailwind recap
- The config object: colours, fonts, max width
- Text classes, gradients and lists
- Grid, responsive layout and background images
- Transforms, transitions, arbitrary values and the finish
Those 23 scrims add up to 75 minutes, which matches the "75 min" on Scrimba's course header. Scrimba's structured data says 26 lessons because it also counts three platform clips at the end (Scrimba Docs, the Scrimbassador referral pitch, and How to Utilize Your Certificate), which are not about Tailwind.
Inside the course, module by module
1. Introduction and Tailwind recap (10 min, 2 scrims)
The intro is three minutes. Rachel introduces herself as "a developer and lifelong learner," shows the two mockups, and explains that the starter has the unstyled HTML, Tailwind via the CDN, and the Google Fonts links already in place. She also warns you about the yellow warning that pops up on every save: "This warning just reminds us that the CDN isn't recommended for production use," and it fades after a few seconds. You will see it a lot.
The second scrim is the longest in the course, almost seven minutes, and it is a speed run through the basics on three coloured sections: colour shades from 50 to 950, font-sans, font-serif and font-mono, padding and margin numbers, flex direction and alignment, the md: breakpoint, and hover:. If any of that is new, this recap will not be enough, and Rachel says as much: "If you're new to Tailwind, I highly recommend checking out Scrimba's Learn Tailwind CSS course."
2. The config object: colours, fonts, max width (17 min, 6 scrims)
This is the part of the course that justifies the "intermediate" label. The aside on the tailwind.config object starts from a real problem: the mockup's orange "is most likely not one of the oranges that Tailwind provides." Her fix is a config.js file loaded after the CDN script, holding tailwind.config = { theme: { extend: { colors: {...} } } }. As Rachel puts it in that scrim, "Think of it like a control center for all of your tailwind styles."
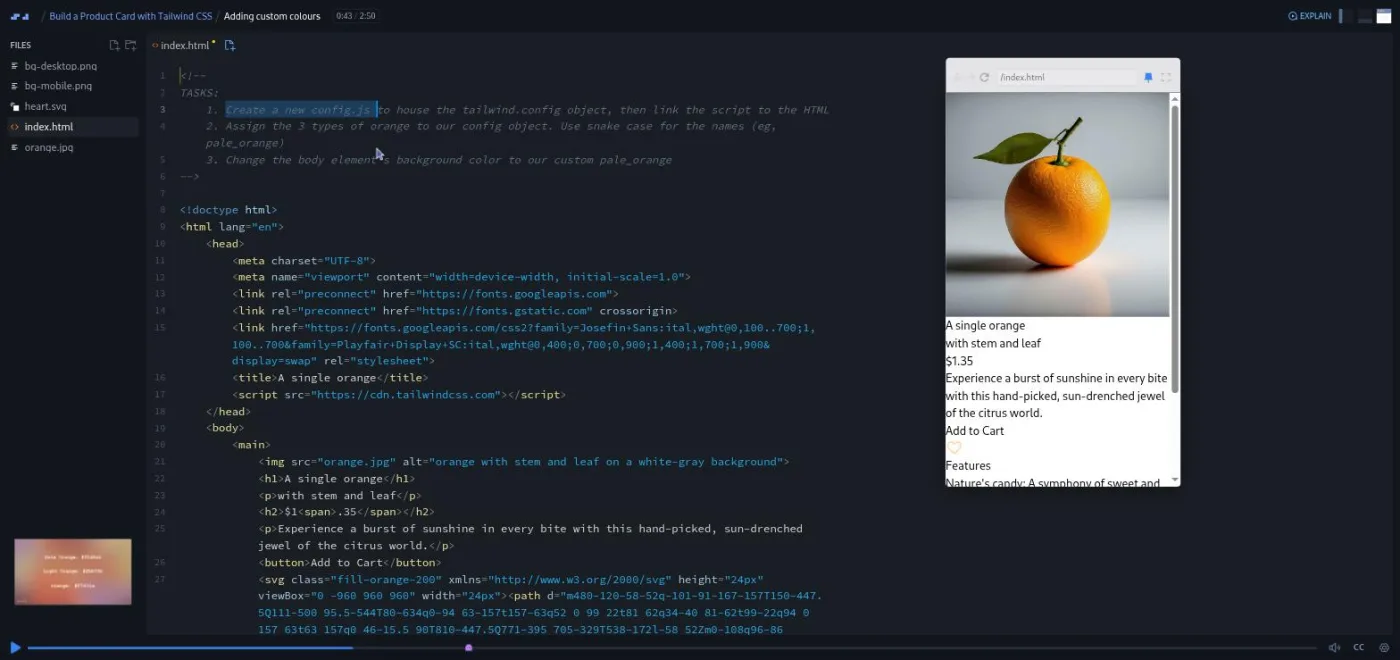
Then you do it yourself. The Adding custom colours scrim gives you three tasks in a comment block at the top of index.html: create config.js, add the three oranges from the slide (pale_orange, light_orange, orange), and turn the page background pale orange. This is also where the course sets its tone for solutions: "Here's how I would do it, but just remember that you could have done things differently, and that's totally fine."
Fonts follow the same pattern. The aside overrides sans with Bebas Neue and adds a new slab family, and explains that the array you type is the same font stack you would write in CSS. Then the project scrim has you override sans with Josefin Sans and add a title family for Playfair Display SC, and apply font-title to the heading and subtitle. The max width aside tries max-w-72, max-w-96, max-w-lg and max-w-4xl on a demo card so you can see the container stop growing. Rachel's reason for caring is practical: "Nowadays, there are monitors that are super super wide so we have to account for that."
Crafting the card puts it together: white background, w-full, max-w-xs, and flex justify-center on the body to center it. By the end of scrim 8 you have a floating white card on a pale orange page.
3. Text classes, gradients and lists (20 min, 5 scrims)
Font and Text Classes is a small, useful lesson about naming. Rachel's rule for remembering which prefix does what: "'fonts' for family and figures, and 'text' for traits." So font-bold and font-title change the typeface and weight; text-2xl, text-gray-500 and text-lg change size, colour and the rest. The task is to style the title, subtitle, price and description to match the mockup, including the small .35 on the price.
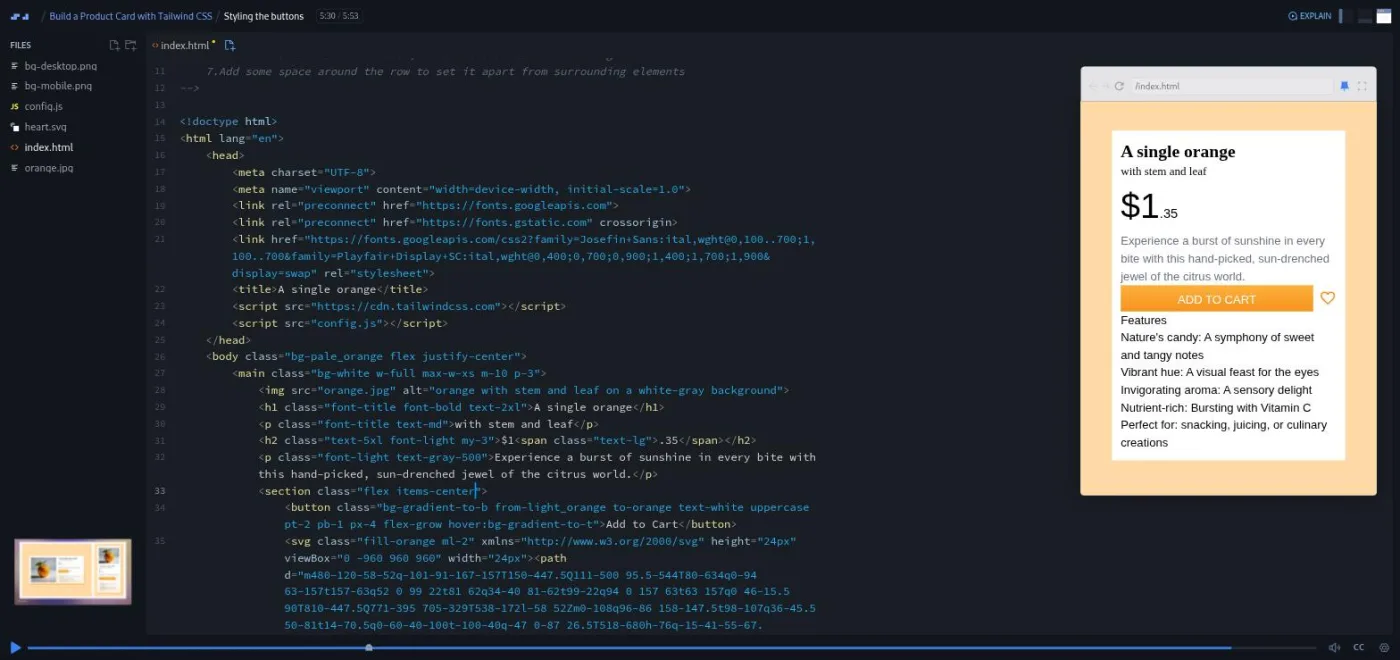
The gradient aside teaches the three-class recipe (bg-gradient-to-b, from-, to-) and lets you finish two of three demo sections yourself. Styling the buttons is the longest project scrim at almost six minutes, and it has the busiest task list. You add a gradient from light orange to orange, white uppercase text, uneven top and bottom padding, and an orange heart icon via fill-orange. Then you put button and heart side by side in a flex row with flex-grow on the button, and add a hover that flips the gradient with hover:bg-gradient-to-t. The hint that you "may want to alter the HTML just a little bit" means wrapping the button and the SVG in a new section.
The lists aside is the one I would point a Tailwind skeptic at. "By default, Tailwind removes all the expected styling we're used to with vanilla CSS," so the demo's ingredients and recipe steps look like paragraphs until you add list-disc and list-decimal, then ml-5 pl-3 to pull the markers inside the box, then marker:text-green-400 to colour the bullets. It has three mini challenges. Styling the features section applies all of it to the card's five-item feature list, with orange markers and a medium-weight span at the start of each item.
4. Grid, responsive layout and background images (14 min, 4 scrims)
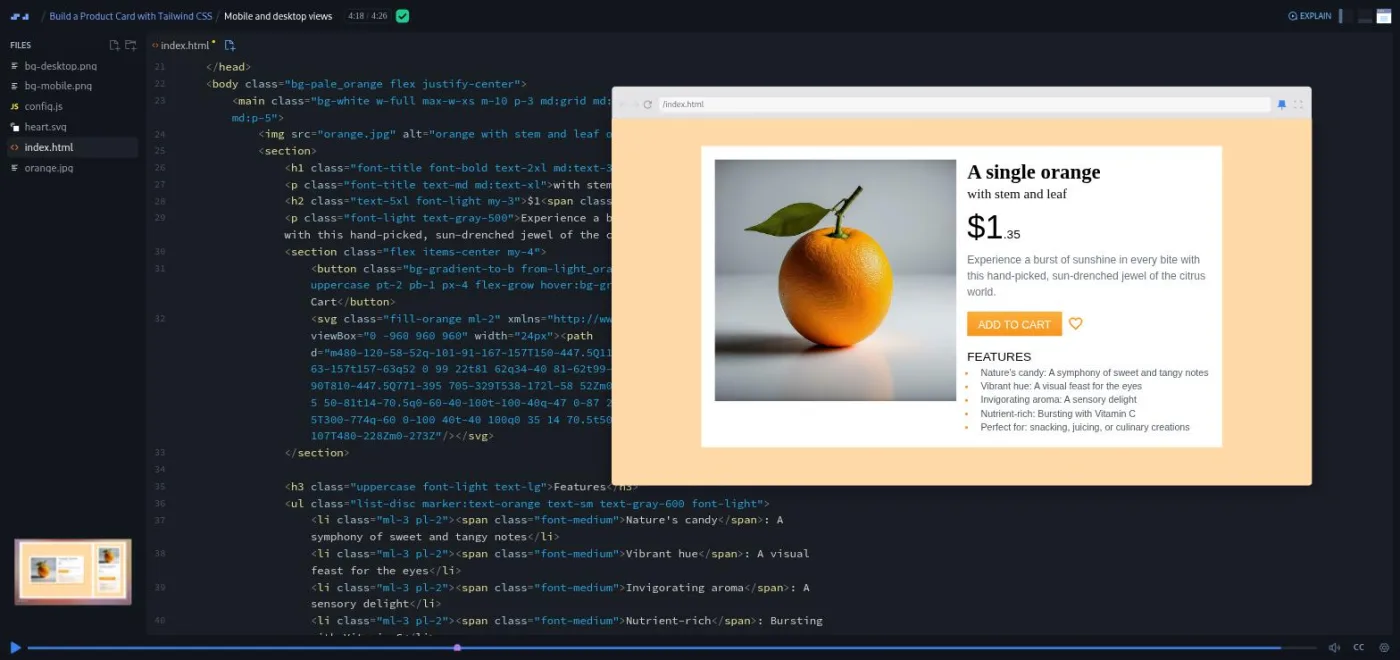
The grid aside is short and shows why people like Tailwind: grid grid-cols-3 grid-rows-3 gap-1 replaces two lines of repeat(3, minmax(0, 1fr)), and col-span-2 stretches the eighth of eight boxes. Then Mobile and desktop views is the most satisfying task in the course. On phones the card stays a single stack; from the md breakpoint up it becomes a two-column grid with the photo on the left, a max-w-3xl container, a gap, more padding, and larger type. You have to wrap the text content in a new section for the grid to work, and Rachel walks through why.
Background images get an aside of their own because the config object comes back: you register mobile and desktop image paths under backgroundImage, then use bg-mobile md:bg-desktop, plus bg-no-repeat, bg-right-top and bg-fixed to control placement. The project version adds the two subtle patterns the client supplied, pinned to the bottom of the card.
5. Transforms, transitions, arbitrary values and the finish (14 min, 6 scrims)
Two asides on four icons: scale-50, scale-x-50, rotate-45, -rotate-45 and translate-y-4, each moved behind a hover: prefix as a mini challenge, then transition-transform, duration-1000 and delay-500 to animate them. The card task is a single line: on hover, the wishlist heart should grow to 1.25 times and take 300 milliseconds to do it. At 1:23 it is one of the shortest scrims in the course.
The arbitrary values aside is the last new idea and a good one to leave on. "Tailwind's square bracket notation allows us to generate a class on the fly with any arbitrary value," so top-[-40px], text-[1.3em] and a shadow-[0_10px_2px_...] with underscores standing in for spaces. The final task uses it for the mockup's hard-edged shadow: shadow-[5px_5px_0_orange], where orange is the custom colour from your config. Rachel's send-off in that scrim: "Super easy task for your last one!"
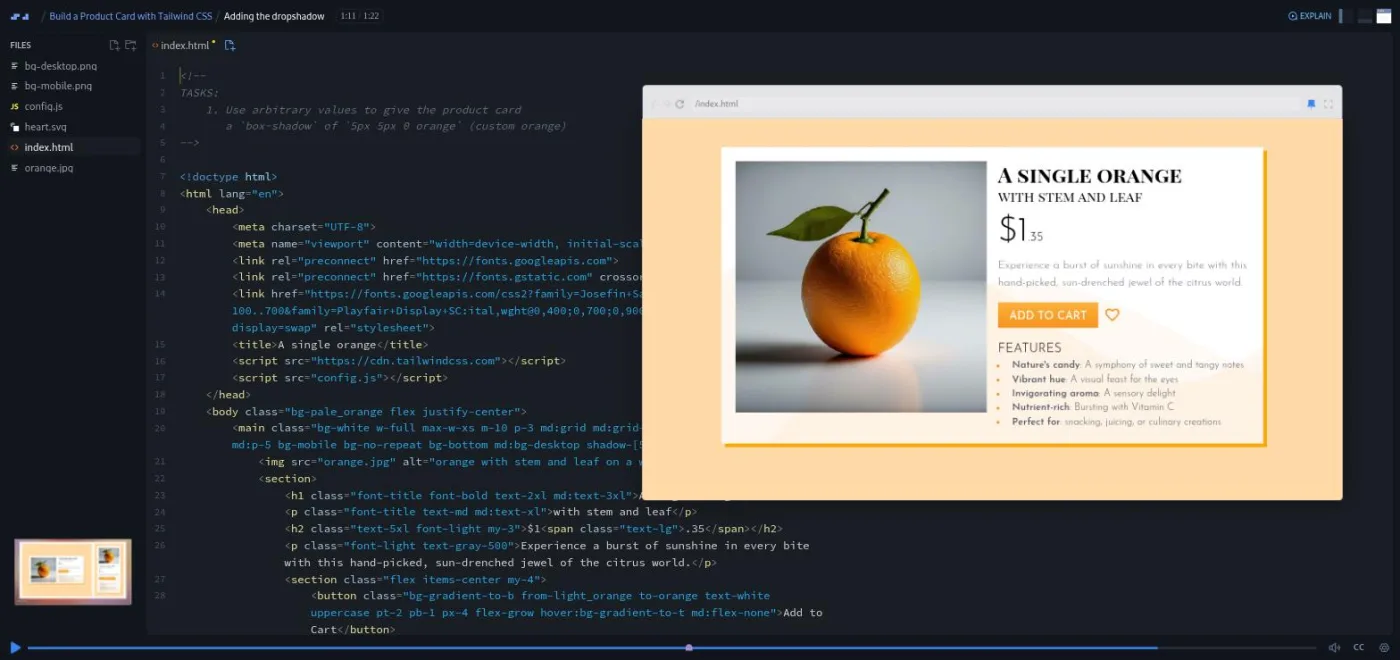
Congratulations! is a 1:23 recap that lists the ten topics and sends you to the Tailwind docs, which "are a treasure trove of information and inspiration." After that come the three platform clips and the certificate.
What a lesson feels like
Scrims here run two to four minutes, with the recap (6:51) and the buttons task (5:53) as the outliers. The rhythm never changes. An aside opens on a small demo page, and Rachel types the new classes while the preview updates. The next scrim opens on the product card with a numbered TASKS comment at the top of index.html and a slide bottom left holding hex codes or syntax. She says "give it a go, and I'll be right here when you get back," you pause, you type, you press play, and she shows her version. All ten project scrims work this way, and most asides also have a mini challenge in the middle.
There is no AI feedback on any of these tasks. I looked for the "Challenge with Instant Feedback" badge that some Scrimba courses show in the table of contents, and this course has none. You check your work against the mockup and against Rachel's solution, which she is careful to call one solution: "let's walk through one solution together."
Every scrim has captions, a timestamped transcript under the settings menu, subtitles in ten languages, and speed controls. Rachel's delivery is calm and slightly formal, with a habit of explaining her reasoning ("personally I think the best way to do this is to use a flex container") rather than just typing. She also hides the preview pane while typing long class lists and brings it back on save, which is worth copying.
Free or Pro: exactly what is gated
The first four scrims carry a SAMPLE badge and open without Pro: the introduction, the Tailwind recap, the config object aside, and the Adding custom colours task. That is about 16 minutes, and it is enough to judge the teaching style and to learn the config object trick.
Everything from Aside - Fonts in TailwindCSS onward, 19 scrims and roughly an hour, needs Scrimba Pro, and so does the certificate of completion at the end. There are no solo projects in this course, so there is nothing extra to unlock beyond the scrims themselves. Pro also unlocks the Pro-only channels on Scrimba's Discord; the pricing page lists basic Discord access as a free feature, so the server itself is not gated. See current plans (opens in a new tab) for what Pro costs in your region.
How long it takes
The 75 minutes is video runtime. With ten project tasks and the mini challenges inside the asides, budget two to three hours: one sitting if you know Tailwind well, two evenings if you keep pausing to check the mockup or read the docs on a class you have not met. The tasks are small enough that you will rarely be stuck for more than a few minutes. If you want more from it, rebuild the card afterwards from the mockups alone without the task comments; that turns a two hour course into a four hour one and is where the learning sticks.
Who it's for, and who should skip it
It fits people who have finished a Tailwind basics course and want to see how the framework handles a design that does not match its defaults. It also suits developers who already use Tailwind at work but have never touched the config object or arbitrary values, because those two ideas are most of the course. If you learn best by copying a mockup, the two client designs are a nice touch.
Skip it if you have never used Tailwind; the seven minute recap will not carry you. Skip it too if you want a large project or a portfolio piece; one card on one page is what you get. And if your team is on Tailwind 4, expect to translate the config object parts into the CSS-first setup yourself.
Start Build a Product Card with Tailwind CSS on Scrimba (opens in a new tab)Prerequisites
Working HTML and CSS, including flexbox, and enough Tailwind to read a class like md:grid-cols-2 without help. Rachel points to Scrimba's Learn Tailwind CSS course twice in the first ten minutes as the place to get that. There is no JavaScript to write: config.js is a single object literal. Nothing to install either, because Tailwind loads from the CDN inside the Scrimba editor.
Where it fits
Take it straight after Learn Tailwind CSS. This course is not part of any Scrimba career path; it is a short supplementary build on its own. If you liked the transforms and transitions asides, CSS Animations goes much further on that topic, and Learn Responsive Web Design covers the breakpoint thinking in plain CSS.
Strengths and limits
What it does well: it teaches the config object and arbitrary values, which most intro material skips; every idea is taught on a demo page and then applied to the real card; the tasks are written as comments in the file so you always know what to do; and the two mockups give you a real target to check against.
Where it is limited: it is 75 minutes long and one component wide; there is no AI feedback and no solo project, so nobody checks your work but you; the CDN-plus-config-object setup is the Tailwind 3 approach and will need translating on Tailwind 4; and only the first four scrims are free.
Related courses and comparisons
- All Scrimba CSS courses, the full CSS category hub
- Learn Tailwind CSS, the fundamentals course this project assumes
- CSS Challenges, more build-from-scratch practice
- Learn Responsive Web Design, the deep CSS layout course
- CSS Animations, if the transforms and transitions asides left you wanting more
- Scrimba vs Udemy, if you are choosing a platform
Partly. The first four scrims (introduction, Tailwind recap, the config object aside, and the Adding custom colours task) are free samples. The remaining 19 scrims and the certificate need Scrimba Pro.
Rachel Johnson, who also teaches Scrimba's Learn Tailwind CSS, Learn Vue and Learn Cybersecurity courses. She introduces herself in the first scrim as a developer and lifelong learner.
One product card for a single orange, from a desktop and a mobile mockup: photo, title in Playfair Display SC, price, description, a gradient Add to Cart button with a wishlist heart, a features list with orange bullets, a background pattern, and a hard orange drop shadow. From the md breakpoint up it becomes a two-column grid.
Yes. The seven minute recap in scrim two covers colours, fonts, spacing, flex, breakpoints and hover, but Rachel says twice to take Learn Tailwind CSS first if any of that is new.
75 minutes of video. Plan two to three hours with the ten project tasks and the mini challenges inside the asides.
No. None of the scrims carry Scrimba's Challenge with Instant Feedback badge. You compare your card with the mockup and with Rachel's solution.
No. Tailwind loads from the CDN inside the Scrimba editor, and the only extra file you create is config.js with a tailwind.config object. There are no npm dependencies.
The course does not name a version. It uses the CDN script and a JavaScript tailwind.config object, which is the Tailwind 3 way of customizing the theme. Tailwind 4 moved that configuration into CSS, so treat the config object lessons as the idea rather than the exact syntax.
Yes. Every scrim has captions, a timestamped transcript in the settings menu, and subtitles in ten languages.
Learn Tailwind CSS teaches the framework from scratch across several projects. This course is one 75 minute build that assumes those basics and adds the config object, custom fonts, gradients, grid, background images, transforms, transitions and arbitrary values.