Build and Deploy Your Portfolio
Kevin Powell's free course builds a one-page developer portfolio in HTML and CSS, then deploys it to a DigitalOcean server, in 2.4 hours across 23 scrims. You get a clean, responsive template with custom-property theming, not a lesson in HTML and CSS from scratch, and the deploy section is a dated 2020 recording of DigitalOcean's dashboard.
Reviewed inside the course with a Pro account, September 2026.
Quick answer
It fits developers who already write HTML and CSS and want to see how an experienced CSS teacher structures a real site with BEM class names, custom properties, Grid and Flexbox. The catch: there are no challenges and no solo project, so the practice comes from typing along and then personalizing the result yourself. Once you are done, Learn JavaScript is the natural next stop for making the site do more than open a menu.
Build and Deploy Your Portfolio
FreeTaught by Kevin Powell (opens in a new tab)
Build a customizable one-page developer portfolio in HTML, CSS and a few lines of JavaScript, then deploy it to a DigitalOcean droplet.
Start free on Scrimba (opens in a new tab)Is it worth your time?
If you can already write HTML and CSS and have nothing online to show for it, yes. Two and a half hours gets you a clean, responsive site with a real structure. Kevin builds it as a template on purpose: every color, font and size lives in a custom property at the top of the stylesheet, so swapping the green for your brand color is a one-line change. He says it plainly in the intro: "this is going to be about building our site. It's not going to be teaching you HTML and CSS."
The part that earned my respect is the CSS reasoning. He explains why the logo gets an empty alt attribute, why headings are not used as subtitles, why a sibling selector beats margins on every column, and why focus states should look different from hover states. Those are the habits that separate a tutorial site from a professional one, and they are cheap to pick up here.
This is a 2020 recording, and it shows. Kevin mentions that "flexbox gap is coming. It's in Firefox, but it's not in the other ones yet," and the DigitalOcean lessons are slides of a dashboard that has since been redesigned. The deploy method itself (rent a Linux server, upload files with FileZilla) is heavier than a static site needs in 2026. Nothing in the build depends on it, so you can just as easily push the folder to Netlify or GitHub Pages.
What you'll learn
Scrimba lists this course as one flat run of scrims with no modules, so the grouping below is mine, made from the lesson order. The counts are the scrims I opened.
Course curriculum
4 editorial groups · 23 scrims · about 2 h 27 min of video
- Introduction and HTML structure
- Styling the site section by section
- Navigation, JavaScript and the project page
- Deploying to DigitalOcean and wrap-up
The course page and its structured data say 24 lessons; that figure includes the Certificate of Completion entry at the bottom of the list, which is not a scrim. My total of the 23 scrim durations comes to 2 hours 27 minutes, which matches the 2.4 hours Scrimba shows.
Inside the course, module by module
1. Introduction and HTML structure (29 min, 5 scrims)
The 5:32 Introduction is a slide deck. Kevin shows the finished design on desktop, laptop and phone mockups, explains that the course is sponsored by DigitalOcean, and sets expectations: "I am assuming you're already comfortable with both HTML and CSS." He links an Adobe XD file with every color, font and spacing value, and says the same link sits in the notes under every lesson.
The next four scrims write all of the HTML. "Setting things up" is the boilerplate: doctype, viewport meta tag, normalize.css and a Font Awesome CDN link. "The header area" adds a logo, a nav-toggle button with an aria-label and an empty hamburger span, and introduces the BEM naming Kevin uses everywhere (nav__list, nav__item, section__title--intro). He is candid that "that might drive some people a little bit crazy having the double underscore there," then explains why the modifier classes will make the template easier to edit later. "Intro section" and "About me, Work and Footer" write the rest. Each section gets an ID that the nav links anchor to. The services block holds three service items, the portfolio holds ten linked images, and the footer has a mailto link and a list of social icons that stays as placeholder letters until Font Awesome comes in.
One line from the header lesson sums up the tone: "You don't need to put logo because if the person hears logo, it doesn't help them if they cannot see it in the first place."
2. Styling the site section by section (68 min, 8 scrims)
This is the heart of the course and the longest stretch of typing. "Setting up the custom properties and general styles" (10:38) creates css/style.css and links two Google Fonts (Source Sans Pro and Source Code Pro). It then defines a :root block of custom properties: two font families, two weights, light, dark and accent colors, four font sizes in rem, and a layered box shadow. An 800px media query redefines the font sizes. Kevin uses that to show why native custom properties beat Sass variables: "you can actually change them within a media query." His verdict on the setup cost: "they do take a little bit more time to actually set up. But then once you're using things and creating things, man, it can just go so so much faster."
The next three scrims style the typography, the intro and the services. The intro section is a CSS Grid with grid-template-areas, min-content and max-content columns, and a green subtitle bar that pokes out to the left of the photo. Kevin first considers absolute positioning, then uses relative positioning with width: calc(100% + 1.5em) instead, and adds a two-layer box shadow via the --bs property. The services section gets a background image with background-blend-mode: multiply, a pseudo-element underline on the heading, a three-column Flexbox layout with a .service + .service margin, and a button with a scale transition. It also gets the site-wide focus style: a 3px accent outline with an offset, "so it's not a hover state. It's really just for my focus state."
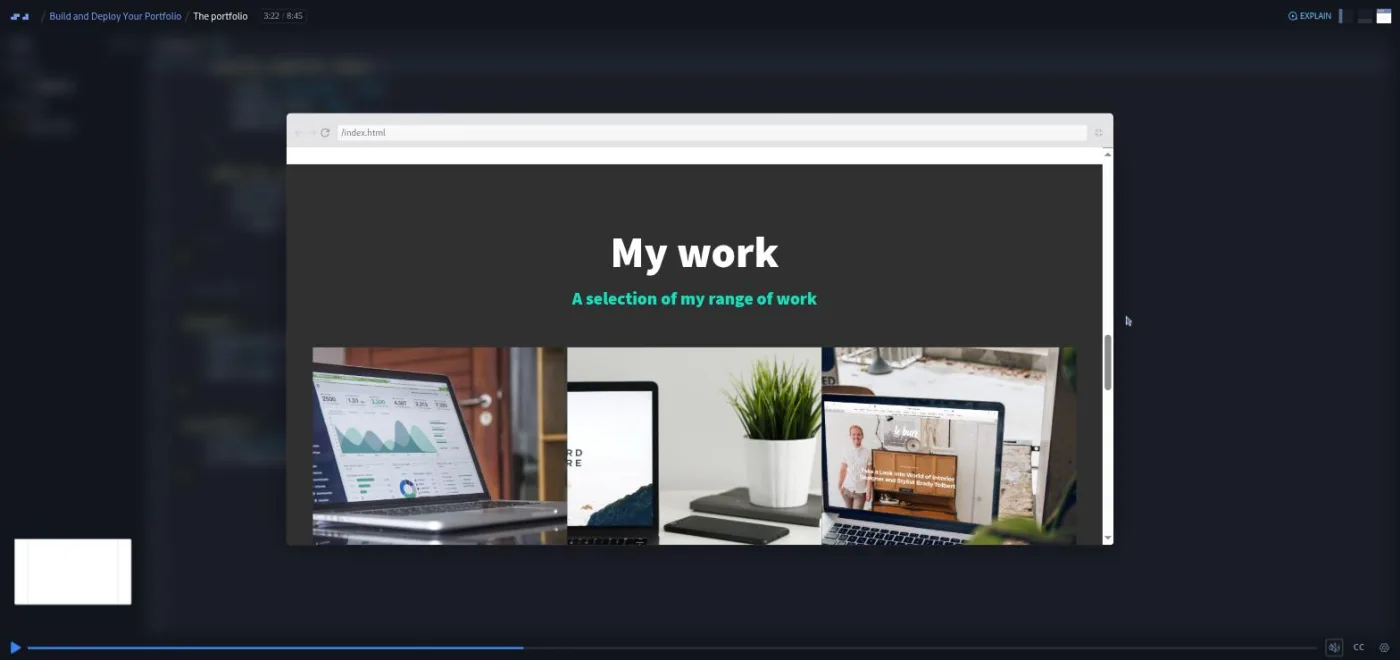
"The About me section" (10:58) repeats the grid idea mirrored, with a 200px image column and a padding-right calc so the subtitle text can never run under the photo. "The portfolio" (8:45) is where the grid pays off: grid-template-columns: repeat(auto-fit, minmax(300px, 1fr)) makes the work samples reflow from three columns to two to one with no media query at all. As Kevin puts it, "you could have one hundred pieces in there, you could have five pieces in there, it's always going to work." A hover effect scales each image inside an overflow: hidden link with a cubic-bezier transition and lets the accent color bleed through at 75% opacity. He mirrors it on :focus so keyboard users get the same effect.
The block closes with two short scrims. "Adding the social icons with Font Awesome" (2:56) is a tour of fontawesome.com and pasting <i class="fab fa-codepen"> markup into the footer. "Styling the footer" makes the icons a Flexbox row, sets color: inherit on every footer link, and gives the social links padding "so it makes it easier to press on them if you're using your finger."
3. Navigation, JavaScript and the project page (31 min, 5 scrims)
Kevin left the navigation for last because "it is often one of the ones that actually takes the most styling to set up." "Setting up the navigation styles" turns the nav into a fixed, full-screen dark panel with the links spaced evenly in a Flexbox column, then slides it off screen with transform: translateX(100%). "Creating the hamburger" builds the icon from a span and its ::before and ::after pseudo-elements rather than an icon font, "the more complicated way," because each bar can then animate on its own.
"Adding the JS" (9:10) is the only JavaScript in the course, and it is about twelve lines. A click on the toggle button runs document.body.classList.toggle('nav-open'). A .nav-open .nav rule slides the panel in. A .nav-open .hamburger rule rotates the bars into an X, and Kevin does it with the turn unit: "I learned about the turn unit and I like showing people that it exists." Finally, a forEach over the links removes the class again so the menu closes when you pick a section. He finishes with scroll-behavior: smooth on the html element and notes it misbehaved inside Scrimba's editor while recording, so it may be commented out in the downloaded files.
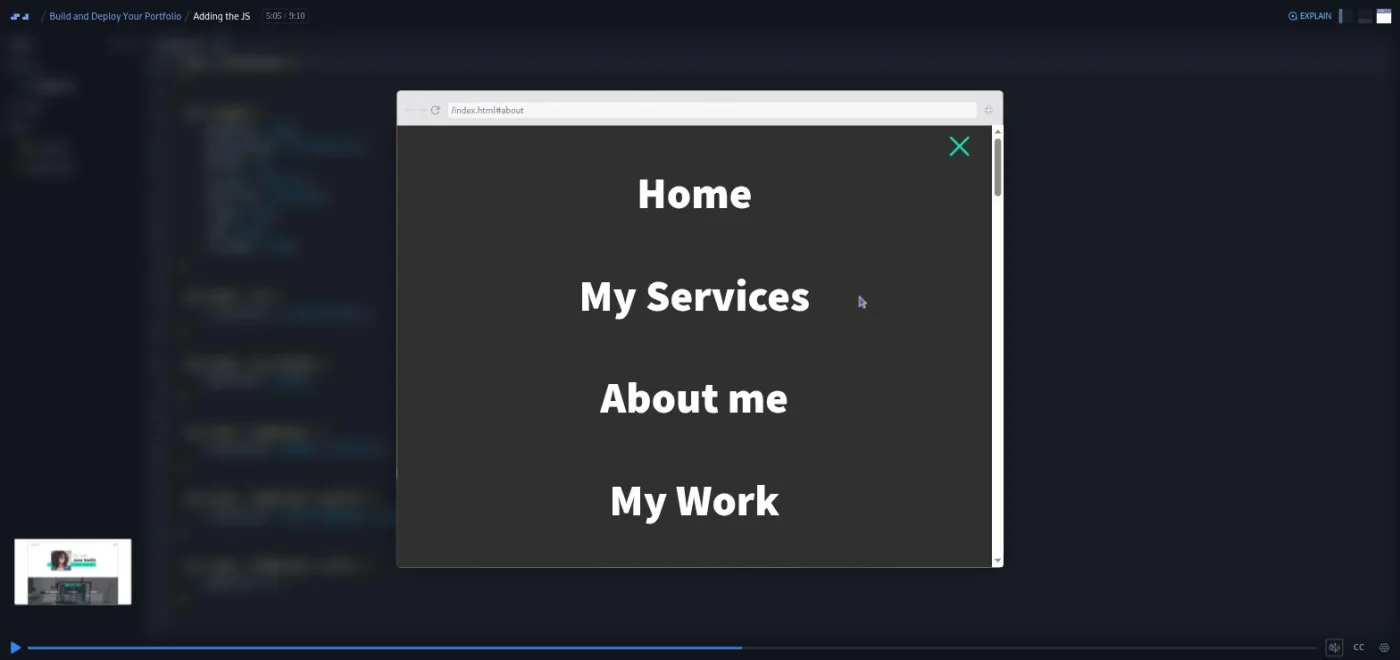
"Creating the portfolio item page" (6:09) copies index.html to portfolio-item.html, keeps the header and footer, reuses the intro section with a project image, and adds a portfolio-item-individual block with paragraphs capped at 600px wide and full-bleed images. The nav links are rewritten to index.html#about and so on so they work from the second page. Kevin's advice on the content is the best career note in the course: "Don't just talk about what the project was, but talk about what you did on the project and why that was a good thing."
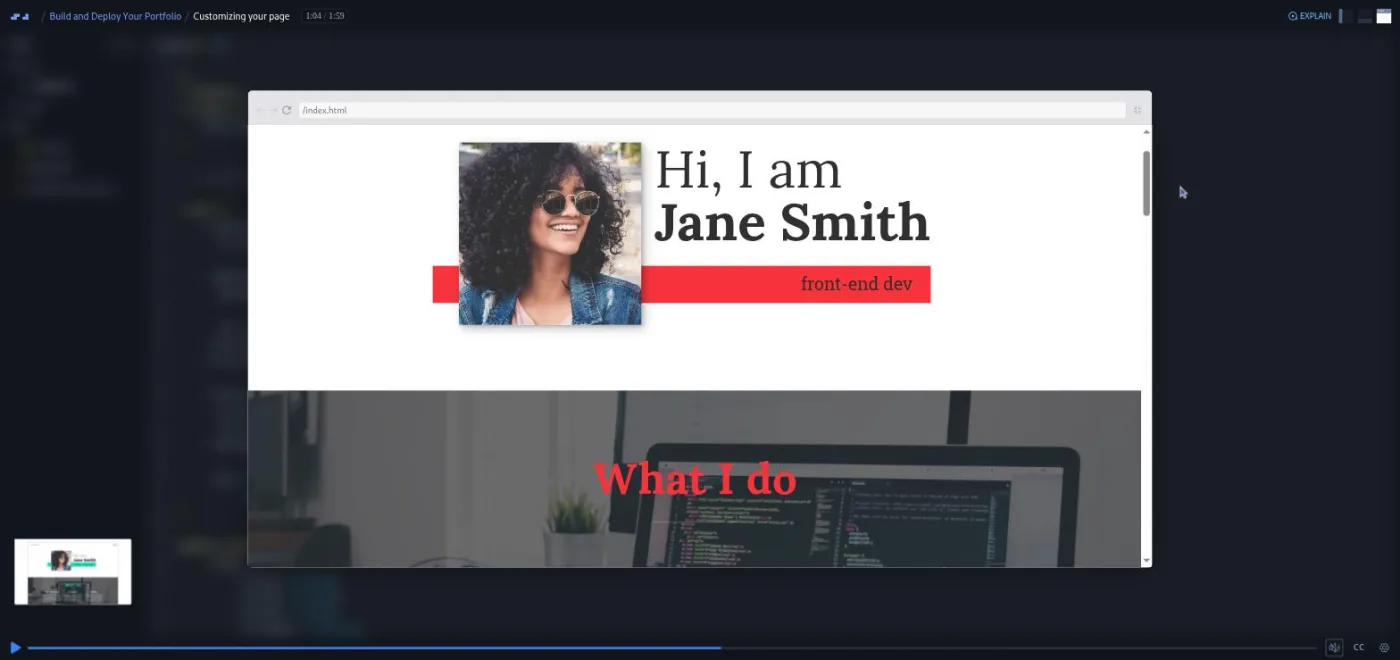
"Customizing your page" (1:59) is the payoff for all the custom properties. Kevin swaps the Google Fonts link, changes --ff-primary and --ff-secondary to Lora and Roboto Slab, and the whole site re-renders. Then he changes --clr-accent to red, and finally swaps the light and dark values to invert the theme. "Your design is your own design after that."
4. Deploying to DigitalOcean and wrap-up (18 min, 5 scrims)
The two DigitalOcean lessons are slides, not code. "What they are and how to set one up" (10:14) explains a droplet as a Linux virtual server you pay for only while it exists, then walks through the 2020 dashboard. The steps are:
- Pick the LEMP stack from the Marketplace instead of a bare distribution.
- Choose the cheapest starter plan and a region.
- Choose a one-time password over an SSH key "because it's faster and simpler to set up."
- Create the droplet, then use the browser console to log in as root and reset the password.
"Uploading files via FTP" (4:10) opens FileZilla and connects over SFTP on port 22. Kevin navigates to /var/www/html and replaces the default index file with the files downloaded from Scrimba's gear menu ("Download as Zip"). Refreshing the IP address shows the live site: "It's as easy as that to get a site up on a DigitalOcean droplet."
Two things to know before you follow these. The course page promises a DigitalOcean credit for new accounts, but the video quotes a smaller figure than the listing does now, so check the current offer rather than either number. And the dashboard screenshots are six years old; the steps are still the same in outline, but the buttons will not be where the slides show them.
The last three scrims are Scrimba's standard wrap-up. There is a one-minute "Congratulations" from Leanne pitching the Frontend Developer Career Path, a two-minute Scrimbassador referral pitch from Per, and a 53-second "How to Utilize Your Certificate" scrim, followed by the certificate entry.
What a lesson feels like
A scrim here is Kevin talking over the editor for four to twelve minutes while he types. The preview pane sits in the bottom corner and he pops it open to check each change, often dragging it narrower to test the mobile layout. When text needs pasting in, he does it "off screen" between scrims, so the next lesson opens with the filler paragraphs already there. The slide thumbnail in the corner holds the section of the design he is currently building, and the design file link is in the notes under every scrim.
There are no challenge pauses. Not one of the 23 scrims stops and asks you to write something, and none carry Scrimba's "Challenge with Instant Feedback" icon. That makes it different from most Scrimba courses: the value is in pausing yourself, retyping what he wrote, and reading the reasoning as he goes. Every scrim has captions, a timestamped transcript panel under the settings gear, subtitles in ten languages, and adjustable playback speed. You can also download the project as a zip from the same gear menu at any point, which is how Kevin himself gets the files out for the deploy.
Free or Pro: exactly what is gated
The whole course is free. All 23 scrims, including the two DigitalOcean lessons, play without a subscription, and only the Introduction carries a SAMPLE badge. There is no Solo Project in this course, so there is no Pro-only exercise hidden inside it.
What Pro adds is the Certificate of Completion listed at the end, the career paths, and the Pro-only channels on Scrimba's Discord. The pricing page lists basic access to the Discord community as free, so the server itself is not gated. For this course specifically, I would not pay for anything: the site you end up with is the credential. See current plans (opens in a new tab) if you want the certificate or the paths.
How long it takes
The 2.4 hours is video runtime and the scrims are long, so budget two to three times that. Five to seven hours is realistic if you type along and pause to check the preview at each step. Two evenings is realistic. Then add your own time for the part that matters: replacing Jane Smith's photos, text and ten placeholder projects with yours, which is an hour or two if your content is ready and much longer if it is not. If you deploy the DigitalOcean way, allow another hour for the account, the droplet and the first FileZilla session.
Who it's for, and who should skip it
It fits people who have finished a beginner HTML and CSS course, can write a Flexbox layout without looking it up, and need a live site with their name on it. That includes career changers who have projects but no portfolio, and anyone who wants to watch how Kevin Powell organizes a stylesheet. It also suits beginners who have done Learn HTML and CSS and want a second project, as long as they accept that some grid and calc moments will go past quickly.
Skip it if you have never written CSS; nothing here is explained from first principles, and Kevin says so. Skip it too if you already have a deployed portfolio, or if you want a JavaScript-driven site: the dozen or so lines of JavaScript here toggle a class and nothing more. And if you specifically want the deploy walkthrough, Deploying with Netlify covers a simpler and more current route.
Start Build and Deploy Your Portfolio for free (opens in a new tab)Prerequisites
Comfortable HTML and CSS. You should recognize Flexbox, know roughly what CSS Grid does, and not be scared by a media query. Kevin uses custom properties, calc(), grid-template-areas, pseudo-elements and BEM, and links to deeper lessons in the notes rather than teaching them. No JavaScript is required; the dozen or so lines are explained as he writes them. For the deploy lessons you need a DigitalOcean account and an FTP client such as FileZilla, and the course does not need either until the final quarter.
Where it fits
This is a standalone career project. Scrimba files it under Career rather than in any path, so it is not listed as part of the Frontend Developer Path. It sits naturally after Learn HTML and CSS and before or alongside Learn JavaScript, which is where you would go to make the site do more than open a menu. Kevin's other Scrimba courses, Build a Multi-Page Website with HTML and CSS and Learn Responsive Web Design, go deeper on the layout ideas he uses here without explaining. Learn CSS Variables is the short course on the custom properties that make this template customizable.
Strengths and limits
What it does well:
- It produces a finished, responsive site in one sitting.
- The code is organized the way a working developer would organize it.
- The custom-property setup makes personalizing the result trivial.
- The accessibility details (aria-label on the toggle, empty alt on the logo, visible focus states, tap-sized social links) come as standard rather than as an afterthought.
Where it is limited:
- There is nothing to solve yourself, so passive watchers will finish with Kevin's site rather than skills.
- The recording is from 2020, which shows in the flexbox gap comment and the DigitalOcean screenshots.
- The deploy target is a paid server for a static site that could be hosted for free.
- The ten portfolio images are stock photos you will need to replace with real work before the site is worth sending to anyone.
Related courses and comparisons
- Build a Multi-Page Website with HTML and CSS, Kevin Powell's deeper layout course
- Deploying with Netlify, a simpler deploy route than a droplet
- Learn CSS Variables, the custom properties this template relies on
- Learn JavaScript, to add interactivity to your site
- All JavaScript courses, the full category hub
- Portfolio projects that get you hired, on what to put in the ten slots
- Scrimba for beginners, if you are just starting out
Yes. All 23 scrims, including the two DigitalOcean deploy lessons, are free with no card required. The only Pro item is the Certificate of Completion at the end of the list.
Kevin Powell, the CSS educator behind the YouTube channel of the same name. The teacher card on the course page credits him, and it is his voice in every build lesson; only the three wrap-up scrims are Scrimba staff.
A one-page portfolio for a fictional front-end developer, Jane Smith: header with a slide-in hamburger menu, intro, services, about, a responsive grid of ten work samples, and a footer with Font Awesome social icons, plus a second template page for individual projects. Everything is themed through CSS custom properties so you can restyle it.
A little. The Adding the JS lesson writes about twelve lines of vanilla JavaScript that toggle a nav-open class on the body and remove it when a link is clicked. Everything else is HTML and CSS.
No. None of the 23 scrims pause for a challenge and none use Scrimba's AI-checked Challenge with Instant Feedback format. It is a follow-along build, so the practice comes from typing along and then personalizing the result.
Kevin rents a DigitalOcean droplet with the LEMP stack from the Marketplace, resets the root password in the browser console, and uploads the files with FileZilla over SFTP to /var/www/html. The lessons are slides recorded in 2020, so the dashboard looks different today. The site itself is static, so Netlify or GitHub Pages work just as well.
Not for the build; it all runs in Scrimba's editor and you can download the project as a zip from the gear menu. For the deploy lessons you need a DigitalOcean account and an FTP client such as FileZilla.
About 2.4 hours of video. Plan five to seven hours to type along, plus whatever time your own photos, copy and project write-ups need.
Yes. Every scrim has captions, a timestamped transcript under the settings gear, and subtitles in ten languages.
Yes, once you replace the Jane Smith photos, the filler text and the ten stock project images. Kevin designed it as a template and shows how to change the fonts, colors and theme in under two minutes in the Customizing your page lesson.